Monday, February 5, 2024

Seasonal Calendar

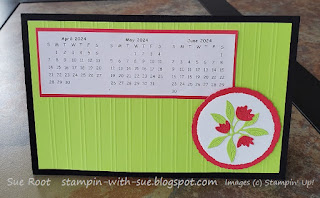
This calendar idea came from my upline Frances. She provided the calendar template and basic measurements but then I changed up the designs. I chose to theme each quarterly panel with the season on the calendar. The first picture is a side view to give an idea how the calendar works. There is a different panel on each of the 4 sides. Each panel has 3 months on it, and you just flip it to show the current quarter.


Winter

This is the design for the first quarter of the year. It was made with the Earthen Textures Bundle. Colors: Moody Mauve, Pretty Peacock, and Sahara Sand (retired).


Spring

For the Spring panel, I used die cuts from the Stippled Rose dies. The background layer was scored on the Simply Scoring Tool. Colors: Parakeet Party and Sweet Sorbet.


Summer

I used the Stippled Roses bundle for this quarter. The roses and leaves are colored with Blends pens. Colors: Melon Mambo and Old Olive.


Fall

The last panel has leaves for Fall. The solid leaves are from the Aspen Tree dies and the open leaves are from the Chic dies. The background layer was scored on the Simply Scoring Tool.  Colors: Cherry Cobler, Daffodil Delight, Old Olive, and Pumpkin Pie.


I hope you enjoyed my seasonal calendar. There is a Basic Black piece of cardstock that tucks under the panels to make a sort of easel to keep the calendar upright.

Tuesday, February 28, 2023

Dandy Designs DSP with Easter Bunny Bundle and Bottled Happiness

Sale-a-Bration (SAB) ends today. It's the time of year when you can get free items with either a $50 or $100 purchase. Dandy Designs Designer Series Paper (DSP) is one of my favorite SAB items. You can get it today with a $100 purchase (before shipping and tax, ends at midnight Mountain time 2/28/23).

Here are some of the cards I made using Dandy Designs DSP. I used the Bottle Happiness stamp set. Ink: Mango Medley and Calypso Coral. Cardstock: Whisper White.


The following cards were made with the Easter Bunny bundle.

What a fun card this next one is! It's called a pocket card. I used the Easter Bunny Bundle, Dandy Designs Designer Series Paper, Double Oval Punch, and Pastel Pearls to make this card. Ink is Highland Heather and Soft Suede. Cardstock is Petal Pink and Highland Heather. Remember Dandy Designs is only available through today. It is free with a $100 purchase. Note about the Easter Bunny bundle: stamps are currently available, but you'll have to wait until May to get the punch. There's always fussy cutting 'til then.


Here are a couple cards using the Easter Bunny bundle, Painted Labels dies, and Dandy Designs Designer Paper.

Remember, Dandy Designs DSP is free with a $100 purchase during Sale-a-Bration. Sale-a-Bration ends 2/28/23. Current host code is R7MFNZWK.

Thanks for stopping by my blog. I hope you found some good inspiration. Please comment and let me know what you think or share cards you've made with the Dandy Designs DSP.

Monday, February 20, 2023

St. Patrick's Day Card

Here is a St. Patrick's Day card made with the Lucky Clover stamp set.


The Designer Series Paper is Dandy Designs which is free with a $100 purchase during Sale-a-Bration. Rhinestones are Basic Rhinestones colored with the dark Daffodil Delight Blends marker. Ink color is Granny Apple Green. I just love how vibrant Granny Apple Green is. Don't you?

Here's how I finished the inside of the card. Isn't that a fantastic sentiment? A good friend is like a four-leaf clover, hard to find and lucky to have.


This is one of the cards we'll be making in this month's class. If you live in the Raleigh, NC area and are interested in attending a class, please contact me. Classes are fun social times, a great way to learn new techniques, and a chance to use new products. Plus you come home with projects you can use - usually cards and sometimes 3d items.

Thanks for stopping by my blog. You can get the items used in this post or any other Stampin' Up! products at stampinup.com. Please select Sue Root, Raleigh, NC if you don't already have a demonstrator.


Sunday, July 10, 2022

WagStamps Team ~ Sale-a-Bration July Blog Hop


Welcome to the WagStamps Team ~ Sale-a-Bration July Blog Hop. As the name implies, we will be focusing on Sale-a-Bration (SAB) items. As you follow through the hop you'll see lots of great projects featuring items that you can get for free during this round of SAB, which is happening now through August 31. You probably just came from Frances Wagner's blog. Weren't her projects great? If you are starting on my blog, you'll get there as you go through the hop.

SAB is that wonderful time of year when you earn free items for orders over $50, free hostess items for orders over $300, and a free gift for joining the Stampin' Up! family. Today I will be showcasing the Tree Lot dies which you can get for free with a $100 order.


The first card was made specifically for my sister and so the color of the camper is Smoky Slate, which to me is the color that most resembles silver when not actually using silver. I chose the verse, which is from Friends Are Like Seashells, because I think it is describes her - but it also describes her camper. You don't just see her type of camper everywhere. She and her husband got it when she retired and for the past year or so they have been having some pretty fun camping adventures.

The Designer Series Paper is a hostess item, Celebrate Everything 12 x 12 DSP. Hostess items are only available when you host a party, are a stamp club hostess, or place your own order that qualifies for hostess merchandise. It's a great deal and has some wonderful patterns, so it is worth thinking about having a party or getting a large enough order in another way so you can get it. And during SAB, if your total party or personal order gets up to $300 you also get a bonus free hostess item. The dies have an indentation around the door and the handle. I used my Basic Black Stampin' Write Marker to go around these lines to highlight them. It's suble but makes them stand out a bit. The top and the bottom of the camper - the parts with the lines - are actually separate die cuts so you can make the camper 2 or even 3 toned. But as I said, I stuck with "silver" because I was emulating my sister's camper.


This next card uses the trees from the Tree Lot Dies. You could easily use a Christmas message and maybe highlight the trees with Wink of Stella and it would be a great Christmas card. However, it's summer and I needed a birthday card, so I used a birthday message. While this would be a nice card for anyone, I like that it can be used for men because I don't always make as many masculine cards. I am sorry but I cannot tell you which set the sentiment is from. I went to the set I thought it was from to double check and found it wasn't from that set. I'm sure you can find an appropriately sized message. Thinking of You or Thank You would also be great options for this card.

I was working on a 3-d item for you but ran into technical difficulties - and because of it ran out of time. I'll share it later, so be sure to come back to see it. If you are part of our Facebook Group, Paper Crafting By Frances, you'll see it because I'll share it there, too. If you aren't, contact your Wagstampers demonstrator to get an invitation. If you don't have a demonstrator, please let me know. I'd love to be your demonstrator and help you with your stamping needs.

As you can see, you can use these dies on their own, but if you want more options and more creative fun, these dies coordinate with the Trees For Sale stamp set.

Thank you for stopping by and for following our blog hop. Next up is Elaine Pellitier. I'm sure you'll love what she has to share with you. She is also highlighting the Tree Lot dies.

Friday, June 17, 2022

More Seas the Day Cards

Here are a couple more Seas the Day cards. This fantastic bundle is still available - but not for long since it's on the retiring list.

The first card is a slim line card. Colors: Bermuda Bay, Melon Mambo, Mango Melody, Basic Black, and Basic White.


I like to add a little something to the inside of my cards. I feel like it adds a fun touch. I didn't do a lot on this one, but because the slim line cards are so long it's good to fill some of the space.


This last card was CASED from fellow demonstrator Jaimie Babarczy. Colors are similar to the slimline card but the background layer is Coastal Cabana and no Basic Black. I don't have a picture of the inside but it has a couple fish and some seaweed.


Thanks for stopping by my blog. If you like these cards, be sure to get the Seas the Day bundle before it's gone!

Thursday, June 16, 2022

Seas the Day Cards

I really wish the Seas the Day bundle would have carried over to the Annual catalog. I am going to share a few cards I made with it while the bundle is still available.

The coloring on the big die cut on this card was done with Blending Brushes. That way I could make the bottom sand colored, the top blue for the water, and the seaweed green - specifically Crumb Cake Pacific Point, and Granny Apple Green. The sea critters were stamped and cut with dies so they would stand out against the colored background. Some were popped up with Stampin' Dimensionals and some were not.


This next card is similar but the big die was cut from Pacific Point cardstock. The background on the base layer was stamped with a hostess stamp that just retired. I wanted to use the Gentle Waves background stamp, but I didn't have it when I made this card so I improvised. I have since rectified that situation but I haven't re-made the card yet. Gentle Waves is also on the retiring list.


This is a simple card made with the Seas the Day stamp set. I didn't use the dies from the bundle. The sentiment is mounted on circles from the Layered Circles dies. I used blender brushes to create the background and then stamped the sea creatures and seaweed right on top.


If you love ocean themes stamps and dies, be sure to get this bundle and the Gentle Waves background before they are gone. And check back tomorrow for a couple more cards made with Seas the Day.

Thursday, May 5, 2022

Tulip Fields Windmill Card


Here's a card I made with the Tulip Fields bundle. This bundle goes together to make such beautiful cards with very little effort, relatively speaking.


I started with a Basic White 4" x 5.25" layer and stamped the rows of tulips in various colors on the bottom part. Then I masked (covered) the top tulips so they wouldn't get covered by blue ink when I sponged the sky using a Blending Brush. There are 2 cloud dies in the die set. I cut some of those and tacked them down before sponging the sky. Be sure to use a very small amount of adhesive - just enough to keep the clouds down while you go over them with the Blending Brush. I then removed the die cuts and sponged a little around some of the edges to make the clouds look softer. This layer was then adhered to the Basic White card base. The die cut clouds can be used again for the same purpose on other cards.

The windmill was assembled using the appropriate die cut pieces. Since I used a brad to attach the blades, they will actually spin around. So, when I go to mail this card, I'll move the blades a bit so the card will fit in my envelope. I attached the windmill with Stampin' Dimensionals so it is popped up.

See, I told you the effort/reward ratio was good. While it takes a little time to do these steps, none of it is difficult and the resulting card is well worth it.

Sunday, April 17, 2022

Easter Friends Chicks

 Happy Easter! Today I am sharing a card I made using the chicks from the Easter Friends set. The first card is my own design, but it was inspired by the 2nd card which was CASED.

The sentiment was cut out using the Stitched Rectangle dies and the clouds were stamped and die cut with the Tulip Fields bundle.


For those of you who don't know, CASE means Copy And Share Everything. Generally, that's why we share things online. We hope to give inspiration to others and in turn we get inspiration from what we see online. It's so common that the acronym is now used as a verb. Sometimes demonstrators sell their designs or otherwise ask people not to copy their ideas, and of course, when that happens I don't. It is considered polite when CASE-ing projects to give credit. This card was CASED from Australian demonstrator Cheryl Hurst. My card is not an exact copy of hers, but it is very similar.

Colors used are Bermuda Bay, Melon Mambo, Gorgeous Grape, and Granny Apple Green. The clouds were stamped with Balmy Blue. The purple strip on the bottom card is actually Highland Heather. It was going to be Gorgeous Grape to match the stamping, but I grabbed the wrong color. Since I still like it, I didn't take the card apart to fix it.

I hope you have enjoyed these cards today and I hope you have a very Happy Easter.

Thursday, April 7, 2022

Easter Friends Bunny Cards

 Today I am sharing an Easter card I made and also a variation of that card. We made this first card at my last stamp club. I stamped the bunny from Easter Friends on a Whisper White layer first. Then, before coloring the background, I masked the bunny so that he stayed white while the Balmy Blue and Granny Apple Green were applied with Blending Brushes. I left the mask on while I stamped the flowers from Painted Poppies. After removing the mask, I colored the flowers with Stampin' Write Markers, stamped the Happy Easter, and assembled the layers.


This second card was made nearly the same way with a few small changes. I used Watercolor Pencils to color the flowers and then went over them with an Aqua Painter to give the effect of watercolor. Because I had a more limited selection of colors in my Watercolor Pencil set I had to choose a different color for the background layer. The Daffodil Delight brightens it up and makes it pop, but I think I prefer the more pastel palette of the first card. Leave a comment and let me know which you like better. I chose to stamp "may your day blossom with joy and happiness" on the front because then I can use it for occasions other than Easter such as a birthday or thinking of you. I could also put a Congratulations there and use it for a retirement card. I like the symbolism of Spring being the start of new life and retirement being a the start of a new phase of life for the retiree.


I hope you've enjoyed today's cards. As I said, with a change in sentiment, this card can be for more than Easter. This bunny would also make some very cute baby cards. Remember, just because a stamp set is geared towards a certain holiday, it doesn't mean those stamps have to be limited to that holiday. Branch out and give your stamps extra life.

#SimpleStamping

Sunday, March 27, 2022

NC SU Demos Blog Hop - In Colors


Welcome to the NC Demos Blog Hop! We are so glad you are here! You may have just came from Tracie Evans Langley's blog. Wasn't it clever how she used the tissue paper? We used the Challenge Dice to determine this month's theme. This is what we came up with: Theme: Friendship, Style: Clean & Simple - no more than 2 layers, Color Scheme: In Colors, Techniques: Sponging, and Accent/Embellishment: Ribbon or Twine. As I'm typing this, I realize I failed the challenge. I tried to do the challenge from memory and forgot the sponging. Unfortunately, it's too late for me to change now, so I've got to go with what I've got. The funny thing is, I do a lot of sponging, so I can't believe that's what I forgot.

I have always loved grid paper for some reason so when I first saw the 2020–2022 In Color Grid Paper, I knew right away that I wanted to make cards with it. These are the first 2 cards but there will be many more since there's 25 sheets of 11" x 17" paper in the pack. This paper is on the retirement list and is currently 25% off, but remember, retiring items are only available while supplies last.

In case you are unfamiliar with the grid paper, it looks like this. Each sheet has all 5 in colors on it. I added the copyright, per Stampin' Up! policy. It is not on the grid paper itself. I love using grid paper when I stamp to protect my work surface. It's so handy to have the measurements right there and I use the lines to help align my stamps. These sheets are so colorful, they add a little fun to my workspace. Plus, I can use them as a surface for crafting and then as long as I didn't mess them up too much, I can flip them over and have pretty paper to use for making cards. Talk about getting your money's worth!


For my first card I used the Celebrate Sunflowers bundle, which is currently 20% off as part of the Savings are in Bloom promotion. If you need an embossing machine, the Mini Stampin’ Cut & Emboss Machine is also 20% off as part of this promotion, as are several other bundles.


I selected an area of grid paper that included Just Jade and Misty Moonlight and cut it to size. In my head, I think of it as representing the grass and sky. I stamped the large sunflower image on Bumblebee cardstock with Early Espresso ink and then cut it out with the coordinating die. Because the theme is Friendship, I used the sentiment that says, "Know that you are loved," because friends are so important and I want my friends to know I love them. This was stamped on Bumblebee cardstock with Soft Suede ink. I left the Bumblebee cardstock a little longer than needed so I could wrap the Linen Thread around it. I wrapped it 3 times and tied a bow.

Here's how I finished off the inside of the card. This is the small sunflower from the same bundle. I colored directly on the stamp with my Bumblebee and Just Jade Stampin' Write Markers. The 2020-2022 In Color Stampin' Write Markers are also retiring and also discounted.


Here's another card I made with this pretty grid paper. You may have noticed the flowers in the bottom corner of the grid paper sheet. I fancy cut them and then lined the image up with two other colors layered behind it. The bow is from black twine out of the Baker's Twine Essentials Pack. I layered all of it on a Basic Black card base.


For the inside of the card, I layered a piece of Basic White with a strip of Bumblebee grid paper. I used the same sentiment as the other card but another sentiment from the same stamp set, Let's Celebrate You, would also be good because friends deserve to be celebrated.


Thank you for stopping by my blog and letting me share my project with you. Please stop by and see Tina Lesson’s post. I know it will be great!

After you finish the blog hop and you start shopping for supplies to make all the wonderful projects that you've just seen, remember to use hostess code HTKGYMKV when you order if you are my customer. If you don't have a demonstrator yet, please consider selecting me. I love helping people express their creativity through stamping.

Happy Stampin', Sue Root


THIS MONTH’S BLOG HOP LIST

Sue Root - you are here

Sunday, January 2, 2022

Peaceful Deer Birthday Card

Don't miss your chance to get this versatile Peaceful Deer bundle before it's gone! Not only did I make some great Christmas cards with it, I also made this masculine birthday card. Win-Win since I love to use my Christmas bundles for more than Christmas and I sometimes struggle with masculine cards.


Here's how I finished the inside of the card. Even though its original use was for Christmas, I think this sentiment is great for a birthday.


January 3rd is this last day to get the Peaceful Deer bundle, as well as any other items retiring from the current mini catalog. 

Update 01/02/21: I just saw these items are carrying over. So, although it will be available again, it won't be at the bundle price and not until July 2022.

#simplestamping

Thursday, December 30, 2021

Tidings and Trimmings Wreath

I know Christmas is over, but I wanted to share this idea using the Tidings and Trimmings Bundle.

You could use a different word under the wreath and use this card throughout the winter.


I used the Layering Circle Framelits to make the wreath base. I used two sizes so that I ended up with an open circle. Then I cut out lots of leaves and layered them on the wreath base. Lastly, I added the sprigs, berries, and bow. This was layered on a 4" x 5.25" piece of wood-grain Designer Series Paper (DSP) from the In Good Taste DSP pack. If you don't have this DSP yet, I highly recommend it. It has a great variety of patterns that I have found super useful. Plus, it's a quite a value at 24 sheets for only $21.00.

Here's how I finished off the inside. Of course, you'd want a different sentiment if you are using it as a winter card. Or, during the slower winter months, maybe you'll want to get a jumpstart on next year's Christmas cards.
 

You still have a few days to get the Tidings and Trimmings bundle before it retires on January 3rd.

Sunday, December 19, 2021

Peaceful Cabin Cards

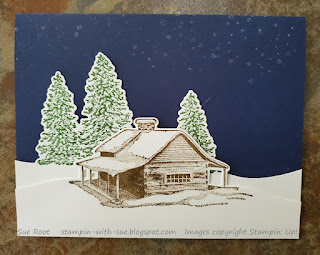
Here are a couple cards I made with the Peaceful Cabin bundle. The first card is layered on a Night of Navy background.


The second card has a sponged background. You can see some extra hills on that card. That's because it was my first attempt using the Cabin dies and I didn't know that when you use those dies, you want to make sure to leave enough extra Basic White at the bottom so there's not a gap between the layers. I cut the extra hills to cover the base layer that was showing through the gaps. I forget the exact measurements I used, but it was something like stamping the cabin at the top of about a 2" high piece of cardstock. It looks like a lot of wasted space at the bottom, but when you cut it with the die, that's what leaves the snow. Then, the trees were stamped near the top of a piece about 2.25" high. If you visualize how high you want them on your card, it will help you decide how high of a piece to use. In addition to height, consider the length. I used pieces that were 5.5" long so they covered the whole base layer from side to side. Then I decided where I wanted the cabin and trees to fall from left to right. I had to shift where I stamped from where the dies fell naturally. That's okay. I just used my paper snips to cut to the edge in a way that seemed like it kept the same flow.


The last picture is the inside of the Night of Navy card. It's a reminder to put a Basic White layer inside cards that have a dark colored base. It makes the card look more finished plus then you can add some stamps that coordinate with the front and easily write a message.

Sunday, November 28, 2021

NC SU Demos Blog Hop - Don't Limit Your Stamps

Hi Stampers! Welcome to the November 2021 NC Stampin' Up! Demos blog hop where we will be showing you other uses for your stamp sets. You may have just come from Frances Wagner's blog. Wasn't her card cute?
Here's a Christmas card I made using the Christmas Season Bundle. It's a beautiful bundle, but what about when you have all of your Christmas cards, 3-d items, and decor pieces done? Well, keep reading for some ideas to use this bundle for other occasions during the Christmas/Winter season and throughout the year.


Those of you who are familiar with the Christmas Season bundle may recognize that the bottom layer under the sentiment is shorter than the die in the bundle. See below how to re-size the die cut. Colors: Mossy Meadow, Merry Merlot, Crumb Cake, Soft Suede, Basic Vanilla. I also used Holiday Rhinestone Basic Jewels and Linen Thread.

The layout in this second card is similar, but I got rid of the pinecones and added some more plants so it would look less Christmas-y. Now it's perfect for a Winter birthday. This is a one-layer card. The background was done with the Birch background stamp. I think the sentiment is from a retired set as the name is not coming to me right now. Colors: Mossy Meadow, Merry Merlot, Cherry Cobbler, Early Espresso, Basic White. 


Here's one more card in Winter colors. This is also a one-layer card. I covered the middle area of the card and stamped several plants. Once I was done stamping I removed the strip of cardstock from the middle of the card so that part remained white. It looked a little plain so I took a ruler and Stampin' Write marker to line the edges of the white area. The sentiment is from Celebrate Sunflowers and is great for a Congratulations or Birthday card. Colors: Garden Green, Old Olive, Merry Merlot, Cherry Cobbler, Basic White. I added a few Basic Rhinestones to bling it up a bit.


This bundle isn't limited to Winter colors. Check out this birthday card done in Spring colors. It's a similar layout to the first card, but I used a whole lot more dots and doubled the Highland Heather plant. Other colors: Balmy Blue, Petal Pink, Basic White. The sentiment is from Timeless Tulips.


As promised, here are instructions on how shorten your die cut so it gives an even border around your sentiment. I started with a 1" x 3" piece of cardstock. Run it through the Stampin' Cut & Emboss Machine with just enough cardstock sticking out the end so you know you won't cut off the end. Notice how the piece does not go the whole way to the end. It will fit on a 1" wide piece but you have to position it just right. If you are nervous about this, just cut your piece a little wider.


Now line it up the other way, so the die shows a little bit of the straight end sticking out. You can see the cut end in the middle of the die. If you position it right, you can feel the edges of the cut piece sort of click into place. This die and the cardstock really are straight. I think my camera must not have been straight, which is why it looks like it gets wider at the one end.

The bottom piece of cardstock shows that the die really fit on that 1" piece and shows you how little extra space there is.


And one last card using the original layout, this time a thank you card in Fall colors. The sentiment comes from Best Birds. The labels are rectangles cut with my Paper Trimmer. Colors: Cajun Craze, Crushed Curry, Old Olive, Sahara Sand, Basic White.


As you can see, there is no need to limit your stamps and dies - even ones with Christmas right in the name. I've shown you birthday, thank you, and let's celebrate you cards in not only Christmas/Winter colors, but Spring and Fall.

I hope you've enjoyed all of these ideas for using your Christmas stamps in non-traditional ways. Continue on the next blog in the hop, which belongs to Tracie Evans Langley, to see even more inspiring ideas.


Monday, November 22, 2021

Tidings and Trimmings Star Card

 Here's a card we made in my recent Stamp-a-Stack. It's made with the Tidings and Trims Bundle.

It's a little hard to see, but I stamped leaves on the 3.75" x 5" layer of Evening Evergreen with Evening Evergreen ink before adhering it to the card base. This just gives a little more visual interest to the card and adds some depth. The star is made up of two die cuts. The Cherry Cobbler star is flat, but the Basic Vanilla is popped up with Stampin' Dimensionals.

Supplies:

Bundle: Tidings and Trim

Cardstock: Cherry Cobbler, Evening Evergreen, and Basic Vanilla

Ink: Cherry Cobbler and Evening Evergreen


Monday, November 15, 2021

Time of Giving Fall Card

 I had a lot of fun making this card. I especially love how the brick wall turned out. The brick background was made by running a piece of Sahara Sand cardstock in the Brick & Mortar 3D embossing folder through the Stampin' Cut & Emboss Machine.  Then I used my sponge dauber to rub Cajun Craze ink over the embossed piece. The key is to rub the ink on gently so that it colors the raised bricks and leaves the non-raised parts Sahara Sand color so that it looks like mortar between the bricks. I also did it so that the color wasn't solid, just like real bricks.

The leaves and the pumpkin were die cut with the Giving Gifts dies and the Thankful stamp is from the Time of Giving stamp set. These are available together in a bundle. The leaves were sponged with various colors using my sponge daubers. I used Old Olive, Cajun Craze, Pumpkin Pie, and Crushed Curry ink. When cutting the scene dies from Giving Gifts, an outline is left around the die so you have to make sure your piece of cardstock is sized to leave the size border you want around it. In this case, I used a die from the Stitched Rectangle dies to cut a Pumpkin Pie rectangle and then ran the rectnagle through the Stampin' Cut & Emboss Machine again with the pumpkin die centered on it. Thankful is stamped on the same size rectangle. The Cajun Craze border underneath was cut to size using my Paper Trimmer. I chose not to use a Stitched Rectangle die for the Cajun Craze layer because the next size rectangle was bigger than I was looking for. The card base is Basic Vanilla. Both of the rectangles are popped up using Stampin' Dimensionals. All of the leaves are flat, except the one on the far left is popped up with just a partial small dimensional at the stem end and then flat on the other end.

Thanks for stopping by my blog today. I you enjoyed the card and the directions on how to get your Brick & Mortar embossing to look like real bricks with the mortar showing in between.

LinkWithin

Related Posts Plugin for WordPress, Blogger...