Showing posts with label Apothecary Art. Show all posts

Monday, April 23, 2012

Center Step Cards

These cards use products from the Occasions Mini Catalog, which ends April 30.  Order today to make sure you get them before they are gone.

This card uses a stamp from Apothecary Art.  This set is made to coordinate with the Labels Framelits, one of which was used to cut out the center image..  The center section is embossed with the Vintage Wallpaper embossing folder.

Front view:
Side view:

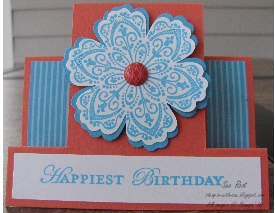
This is a shorter version of the center step card.  It uses Mixed Bunch, the Blossom punch, Apothecary Art (the sentiment), Designer Series Patterns Pack paper, and a brad that I got for free during Sale-A-Bration.
View other Center Step cards that I made and see a link to instructions.

Order products needed to make these cards at my Online Store.

If you have questions about any of the products used in today's cards, please feel free to ask.


Tuesday, February 21, 2012

Easter Card and Basket

Here are two of the three projects we will be making in my upcoming class -- an Easter card with a matching basket.  This class will be offered Saturday 2/25 and Wednesday 2/29.  There's still time to register.  Check out the details here and then contact me to let me know which date you'll be attending.


 Both projects use a stamp from Apothecary Art and one from Delightful Dozen.  The stamped images and the Certainly Celery layer behind them were cut out using the Labels Framelits.  I used my blender pen and ink to color the flowers.  The Certainly Celery pieces were embossed using the Square Lattice embossing folder.  I added Basic Pearls for accent -- in the top corners on the card and along the handle of the basket.

The bottom of the card and of the Regal Rose layer were cut with the Adorning Accents die and then the Regal Rose piece was embossed using the Adorning Accents Embossing Folders.


The handle of the basket was made with the Tasteful Trims die.  The design of the basket itself is actually very easy and has been around for a quite awhile.

Hope you enjoyed today's post.  Remember, if you are local to the Raleigh, Garner, Clayton, Fuquay-Varina or Apex, NC area you can make these projects in my upcoming class.  Also, if you've never been to one of my events before, you'll be entered into a drawing to win a free class.

Happy Stampin', Sue Root, Independent Stampin' Up Demonstrator

Monday, January 30, 2012

Marina Mist Sponged Card

Here's another card we will be doing in my upcoming stamping class.  See details here and then contact me to register.  The class will be full of information.  Don't miss it.


Tuesday, January 17, 2012

Mixed Bunch Center Step Card

This is one of the January club cards.  It is a center step card.

The card base is Pool Party with layers from Everyday Enchantment DSP.  The big flower was stamped with Mixed Bunch, punched with the Blossom Punch and layered on a Calypso Coral punched blossom.  The brad in the center is from the In Color Designer Brads.  The smaller flowers were stamped with Fresh Vintage, cut out and layered on a Calypso Coral punched blossom from the Blossom Bouquet Triple Layer Punch.  There are small basic rhinestones in the center.  The sentiment is from Apothecary Art and was stamped on Whisper White, then layered on Lucky Limeade.  The ink is Calypso Coral.

Front view:


Side view: 


Thanks again to Laura Lipe for showing how to make this style card on her blog.  It has quickly become a favorite of mine.


LinkWithin

Related Posts Plugin for WordPress, Blogger...