Showing posts with label Woodgrain Embossing Folder. Show all posts

Sunday, March 27, 2016

Happy Easter!

Happy Easter friends! Check out this Easter Lily made with the Festive Flower punch. The leaves were stamped with a stamp from Friends and Flowers. The cross was embossed with the Woodgrain embossing folder and my Big Shot.

The background was embossed with the Fluttering embossing folder on retired Core'dinations cardstock. Inside is the pretty Easter message from Suite Sayings, which is what I wish you this Easter and always:

Wishing you all the beautiful blessings of Easter.

*The Easter Lily is CASEd from another stamper, but unfortunately I cannot find the original post so can't find out who to give credit to. For some reason, I didn't pin it - so let that be a lesson: pin those cards you like as soon as you see them ;) If I find it later, I'll add it.

Wednesday, August 19, 2015

Hexagon Bird Box

This project uses the Envelope Punch Board, which is on the Weekly Deals this week! Order the punch board from me and I'll send you a tutorial of how to make this box!
 
I'm really excited about this project because I developed the pattern myself. I got some ideas from different projects, but the the hexagon box and adding the lid came from me. The way it's decorated was also my design. Hope you enjoy it!


Here's a view from the top. It's actually a removable lid so you can use it as decor or as an actual box. How cute would it be to give a gift in this?


I know the eggs probably aren't available this time of year, but you could probably use round candies and no one would complain. I was fortunate enough to get to demonstrate this project to a group of other demonstrators in March. Not sure why it never made it on my blog...maybe so I could post it when the Envelope Punch Board is on sale ;)

See another project and a video about the Envelope Punch Board here. This is also the tool used to make those cute file folder cards you've seen. We made one of those in club one month.

Monday, October 27, 2014

TSSC 338 - Newborn King Gift Box

Here's my design team sample for this week's Techno Stamper Sketch Challenge. As soon as I saw this week's sketch, the square shape made me think of a gift box. This is the first time I tried out my new Gift Box Punch Board. I like it!
 

Supplies:

Stamps: The Newborn King
Cardstock: Early Espresso, Night of Navy, and Whisper White
Designer Series Paper (DSP): Neutrals Paper Stack (Retired)
Ink: StazOn Black, asst. Stampin' Write Markers for coloring
Big Shot: Lucky Stars Embossing Folder, Woodgrain Embossing Folder, Circles Framelits
Ribbon: Early Espresso Scalloped Tulle Ribbon (on Clearance Rack)
Tools: Gift Box Punch Board
 
Here's this week's sketch. As you can see, I moved my ribbon and bow so that the ribbon went around the box w/the bow (or in my case, more of a knot w/tails) on top.
 
You can link your project and see the rest of the design team samples at the Techno Stamper Sketch Challenge site. Hope you'll play along this week!
 

Thursday, June 12, 2014

Look Up To Father - Father's Day Card

This is a variation of a card we did in our last club class. I used the single stamp Look Up To Father. After I stamped the image, I used my paper trimmer to cut it apart.

The background was made with the Big Shot and Woodgrain Embossing Folder. I embossed Core'dinations cardstock and then sanded it. I sure am going to miss the Core'dinations. Good thing I stocked up! The ribbon was current when the club met, but has since retired.

The card we made in club was similar. We left the image whole, then mounted it on a longer piece of Garden Green cardstock and trimmed the bottom of that piece with Fringe Scissors. The ribbon went across the card horizontally and we embellished it with a button. Sorry I don't have a picture to share, but hopefully you can get the idea.

Sunday, May 25, 2014

Golf Spinner Card

I have to say, I absolutely love the projects we'll be making in class on Tuesday (5/27). I've CASEd two of them, so it's not like I'm bragging too much. ;) I did put my own spin on them, though.

I got this idea from Lynn Starzl, another Stampin' Up! Demonstrator. It's a circle spinner card. I haven't made one of these in years. It was fun to do again. And with Father's Day coming up, this was the perfect card. Speaking of perfect, I have a retired set with a stamp that says, "Hope your day is par-fect". Figured it would be "par-fect" for the inside of the card.


The golf ball spins around the hole. How cute is that? If you check out Lynn's card, you can see how I changed it. I put the grass and tee at the bottom and put a flag in the hole.

As you can see in this picture, the golf ball even has dimples. They were made with the Perfect Polka Dots Embossing Folder. I just used the debossed side.


Supplies:

Stamps: Project Life Day to Day
Cardstock: Lucky Limeade, Naturals Ivory, Smoky Slate, Whisper White
Ink: Early Espresso
Big Shot: Circles Framelits, Perfect Polka Dots Embossing Folder, Woodgrain Embossing Folder (on tee)
Tools: Fringe Scissors, Petite Pennants Builder (flag - cut end off), 1 3/8” Circle Punch (golf ball), Build a Blossom (for tee), Sponge Daubers (to darken/shadow inside of hole)

Thanks for stopping by my blog. If you try one of these, put a link in my comments. I'd love to see it!

Not a stamper or not enough time? I will make this card for you to give to a golfer in your life for $5 (includes high quality Stampin' Up! envelope).  Contact me for details.

Also, there's still room in Tuesday's class – 1:00pm or 6:30pm. The other projects are another masculine card and a gift card wallet. See details here. Let me know by 5:00pm Monday if you'd like to come.

Monday, January 20, 2014

TSSC 298 - Lovely As A Tree

Here is this week's Techno Stamper Sketch Challenge sample.  It's a 3 1/2" x 5" card and fits in the Crumb Cake Note Card Envelopes (Item # 131528)  which are on sale through today.
 
 
Stamps:  Lovely As A Tree, Teeny Tiny Wishes
Cardstock: Chocolate Chip, Crumb Cake, Gumball Green, Naturals White, Pool Party
Ink:  Gumball Green, Soft Suede
Big Shot:  Bitty Banners Framelits, Woodgrain Embossing Folder
 
I used an Aqua Painter to color the tree.  Since the lines got kind of blurry, I stamped the tree image again after the tree was colored.  I used the Stamp-a-ma-jig to make sure the stamp was lined up right on top of the previously stamped image.
 
As I mentioned, the envelopes are on sale this week.  Here's the envelope for this card.  I used the Oak leaves stamp from Lovely As  Tree on the back, across the flap.  I stamped the tree on the front of the envelope.  As I often do with larger stamps, I only used part of the image.  I also added Oak leaves to the inside of the card.  I'll add an appropriate message before I send it.
 
Here is this week's sketch, which provided the inspiration for the above card:
To play along, create your own project using this sketch.  Go to the TSSC site and link your entry.  You also can check out the rest of the design team samples while you're there.
 
Check back tomorrow to see the new set of Weekly Deals.

Tuesday, November 26, 2013

Floral Frames Wreaths (plus Weekly Deals 11/26-12/2)

The Floral Frames Framelits are more versatile than you might originally think.  They make beautiful flowers and with 5 different framelits in the set, you can make a wide variety.  But there is so much more you can do with them.

 When I saw these framelits on the Weekly Deals list, it was just the motivation I needed to make these wreath cards.  This is the third one I made, but I'm sure it won't be the last.

I like how the double layer makes it look more full.  The "berries" were made with the Cherry Cobbler Dazzling Details that are on sale as part of the Holiday Sale.  The design on the wreaths were stamped with Daydream Medallions

The card base is Crumb Cake that has been embossed with the Big Shot and the Woodgrain Embossing Folder to look like a door.  The ribbon is Cherry Cobbler 1" Grosgrain Stitched Edge Ribbon.  Merry Christmas is from Petite Pairs, which is full of great messages.

Here's another wreath card I made.  Many of the supplies are the same.  But on this card Merry Christmas was stamped on Naturals Ivory cardstock and then cut out with one of the Bitty Banners Framelits.  The background is Cherry Cobbler mounted on a Naturals Ivory base.
 Here's the inside of one of the cards.  I used the cutout from the front wreath to make a little wreath for the inside.  I used the 1/2" circle punch to cut out the center of the wreath.  The message is the matching sentiment for Merry Christmas from Petite Pairs.
 Here's the first wreath card I made.  It's 4 1/4" square.  I like it's simplicity.
I hope these wreath cards have given you some inspiration.  The Floral Frames Framelits and many other great items can be found on the Weekly Deals list.  And don't forget that there are lots and lots of wonderful Stampin' Up! items on sale as part of the Holiday Sale.  Both sales end December 2nd.

Weekly Deals

We hope you enjoy this week's Weekly Deals! 


Floral Frames Framelits Dies Item # 127012 
Regular Price: $26.95 US/$32.95 CAN
Discounted Price: $20.21 US/$24.71 CAN


Peekaboo Frames Bigz Large Die Item # 124587
Regular Price: $32.95 US/$40.95 CAN
Discounted Price: $24.71 US/$30.71 CAN


Soft Sky Classic Stampin' Pad Item # 131181
Regular Price: $5.95 US/$7.25 CAN
Discounted Price: $4.46 US/$5.44 CAN


Regals Stampin' Write Markers Item # 131262
Regular Price: $28.95 US/$37.95 CAN
Discounted Price: $21.71 US/$28.46 CAN


1" Square Punch Item # 124094
Regular Price: $15.95 US/$21.95 CAN
Discounted Price: $11.96 US/$16.46 CAN


Cherry Cobbler 3/4" Chevron Ribbon Item # 130012
Regular Price: $8.95 US/$12.50 CAN
Discounted Price: $6.71 US/9.38 CAN


Beautifully  Baroque Textured Impressions Embossing Folder Item # 130917
Regular Price: $7.95 US/$9.95 CAN
Discounted Price: $5.96 US/$7.46 CAN


Compilation of Recipes Designer Template Item # 127755
Regular Price: $14.95 US/$16.50 CAN
Disc

Monday, April 29, 2013

Chalkboard Graduation Card (LNS Challenge 221)

The Late Night Stampers Challenge this week is to create a celebration card: 

This week we want you to create a card, scrapbook page, 3D item, or anything else you can think.  For instance: Graduation is coming up so make a graduation card/ gift card holder/ scrapbook page.

I chose graduation since I have a daughter graduating this year.


I've been wanting to try the Chalkboard technique for a while and decided graduating from school, where they use chalkboards, was a good start.  Most of the stamps are from Pure Gumption.  The banner and numbers for the year are from Designer Typeset.  It's the first time I've used the new photopolymer stamps from Stampin' Up!   Turns out I like them.  They are much better than the acrylic stamps I tried years ago.  You can see some cute samples that I re-posted from the Stampin' Up! blog here.  The stamp inside the banner (congrats GRAD) is from Blue Ribbon.

I made the chalkboard frame by dry embossing the card front with my Big Shot and the Woodgrain Embossing Folder.  Then I used my SU! Paper Trimmer* to cut out the inside rectangle.  That way the chalkboard is actually framed (as opposed to just taping it on top).  I love using the Paper Trimmer for tasks like this because I can use the built in ruler to see exactly where to put down and lift up my blade.  Plus, it gives me much more control than a craft knife (with which I can never cut straight).

Thanks for stopping by my blog to check out my take on this week's challenge.  You can see the rest of the design team samples and link your own entry at the Late Night Stampers Challenge site.  Hope you'll play along.

*Features of the SU! Paper Trimmer:

A cutting and scoring tool made with crafters in mind!

· Cutting and scoring.  Cut anywhere, in any direction.  Full 12" cut or score.
Keep scoring and cutting blades on the track at the same time.


Includes:
1 cutting blade and 1 scoring blade.
· Measuring. Extended 6-1/4" base. Extend ruler to 15-1/2".
· Storing. Compartment under base to store blades, scoring stylus, more!

Saturday, December 15, 2012

Holiday Frame with 3-D Ornament

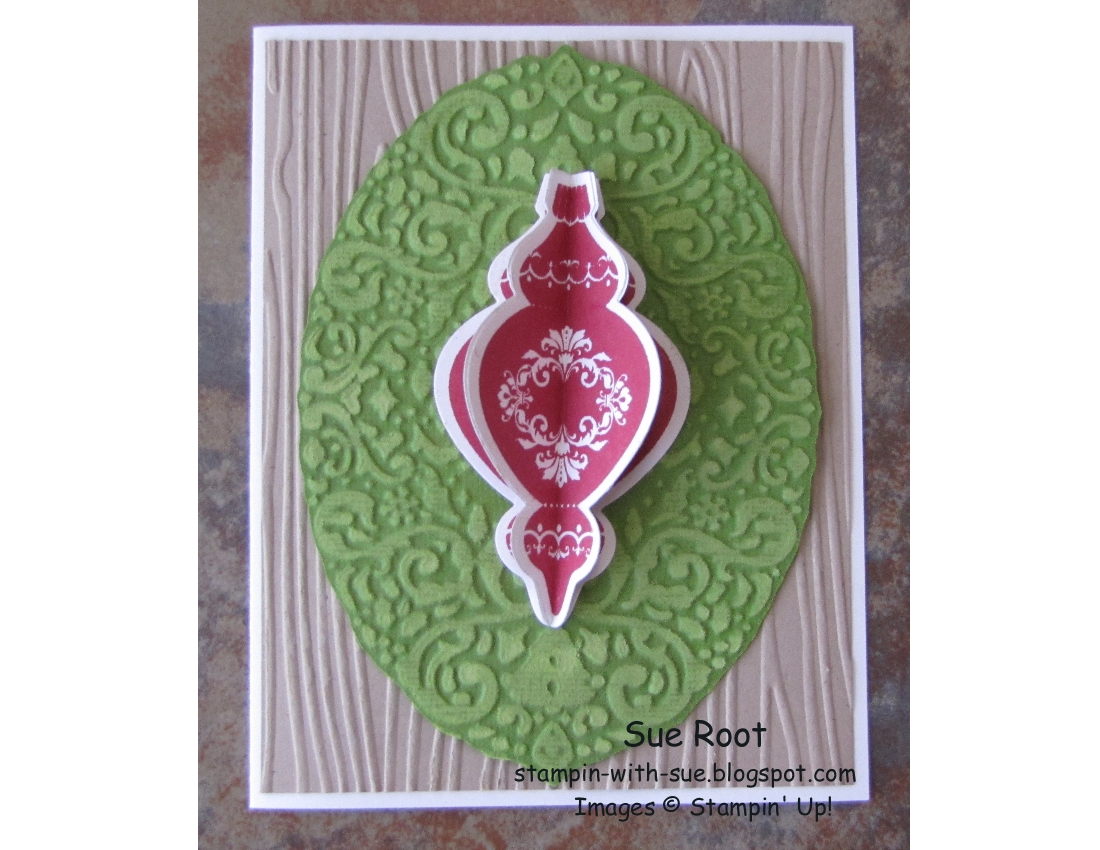
This Christmas card, which we made in a recent class, uses the same process as making a 3-D ornament from stamped and cut images.  But, instead of 6 stamped ornaments, it only takes three since the card only has a half of an ornament on the front.  It was made with the Ornaments Keepsakes stamp set and Holiday Ornaments framelits.  The ornament is layered on a wreath that has been embossed with the  Holiday Frame embossing folder and Big Shot.
 Here is an angled view to show the ornament better.  Bonus: the ornament will lay flat to mail.
Here is another example of this type of card.  This wreath was layered on Crumb Cake card stock embossed with the Woodgrain embossing folder.  I think the wood grain makes it look like the wreath is hanging on a front door.

Thursday, December 13, 2012

Holiday Frame with Berries

Wreath Card
I embossed the wreath on Whisper White card stock using the Holiday Frame Embossing Folder and the Big Shot.  Then I cut out the wreath and sponged it using sponge daubers and three different green inks.  I used the circle from the Itty Bitty Shapes Punch Pack to make the berries and then mounted the wreath on a piece that had been embossed with the Woodgrain Embossing Folder.

Thursday, November 22, 2012

Happy Thanksgiving!

Wishing you all a wonderful, blessed Thanksgiving!
We made this card in one of my classes and it was a big hit.  The leaves were cut using the Big Shot and the Autumn Accents die.  Then they were folded in half and run through the Woodgrain Embossing Folder to give the impression of veins on the leaves.  I don't know who thought of this because I've seen it several places, but I think it's a great idea.  The button was cut using the Sweet Buttons Embosslit and then I made a little knot with Baker's Twine and used just a dot of Tombow Multi-purpose Glue to attach it on top of the button.

The Early Espresso Strip of Core'dinations card stock was also embossed with the Woodgrain Embossing Folder.  Then it was sanded to show the lighter core on the raised lines.  The Happy Thanksgiving stamp is from Teeny Tiny Wishes.  It was punched out using the Word Window punch.  Then I punched a piece of Early Espresso Core'dinations card stock with the Modern Label punch to layer behind the sentiment.  I sanded around the edges to make it look distressed.

Thanks for stopping by my blog today.  I am thankful for so many things, not only on this Thanksgiving holiday, but on every day.  Among the things I'm thankful for are my wonderful blog readers and my fantastic customers.

Thursday, November 8, 2012

Lovely As A Tree with Top Note Die

The tree on this card is from Lovely As A Tree, which is an absolutely gorgeous set.  The fall colored leaves were done by coloring the stamp directly with watercolor pencils, spritzing the stamp with water and then stamping the image.  Then I inked up the tree stamp with Soft Suede ink and used my Stamp-a-Ma-Jig to stamp again directly over the water colored leaves.  I taught this technique (with this stamp) at a recent class and everyone loved it as much as I do.

I also used the Woodgrain Embossing Folder, which is perfect for all sorts of projects -- anything with leaves or trees obviously, but also behind a wreath to look like a door or with tools to name a few.  The More Mustard layer was cut with the classic Top Note die.  The acorn was cut from Early Espresso Core'dinations card stock with the Autumn Accents die.  I peeled the layers apart, trimmed the cap and glued it back on the lighter layer.


Monday, September 24, 2012

Wonderful Wonderfall


Here are a couple of cards made with the Stampin' Up set, Wonderfall.   On both, I also used the Autumn Accents Bigz Die.

 I thought it was cute to put the acorn on the inside of the card.
 
This card also uses the Woodgrain embossing folder, Teeny Tiny Wishes, the Word Window punch, and the Modern Label punch.


Wednesday, September 5, 2012

Autumn Accents Cards

I have two different cards to show you today that use the new Bigz die, Autumn Accents.  This die is fun to use on its own with colored card stock, but it's also great to use with the coordinating Stampin' Up stamp set, Wonderfall.  The background on both cards was done by embossing the new Early Espresso Core'dinations Card Stock with the Woodgrain Embossing Folder.  Then I used the new Stampin' Sanding Block to reveal the lighter color below the surface.  The Core'dinations Dust Bunny worked like a charm to pick up all the card stock "fluff" (that's a technical term there, lol) that was left after sanding.  This is the first time I used the Core'dinations and I've got to tell you, I'm going to be using it a lot!  I can't wait to get the other colors!


On the first card, I used the Big Shot and the Autumn Accents die to cut assorted leaf shapes out of different colored card stock.  Then I embossed them with the following embossing folders (clockwise from the top left):  Chevron, Houndstooth, Fancy Fan.

On both cards I used the new Natural 7/8" cotton ribbon -- another first.  I love that you can stamp right on it!  It was hard to see in the picture of the card, so I've included a close up so you can see how nice the stamped image is.  I used the set Friendly Phrases.  On this card I frayed the edges of the ribbon.  On the other card I wrapped it around the Woodgrain layer.

 To get the stamped images on the leaves, I cut them out first (again with the Autumn Accents die) and then used the Wonderfall stamp set.  It's kind of hard to see, except on the green leaf, but I tried to make the colors a little variegated.  I did some rock and roll technique and some thumping.  I actually removed a little color from the green leaf with the blender pen before thumping with other colors.  The acorn I colored directly on the rubber with Stampin' Write markers (Soft Suede and Crumb Cake).


All of the products used to make both cards are available in my Online Store.

Please feel free to contact me or leave a comment if you have any questions or if you'd like to let me know you enjoyed today's post.  Comments and purchases are always appreciated!

Thanks for stopping by my blog today.

Monday, September 3, 2012

LNS Featured Stamper - Siara Acdal

Hope you've been having fun playing in Late Night Stamper's Treasure Hunt game.  Not sure what that is?  Check out the details here.   You can win $150 in FREE Stampin' Up Merchandise.  Check back often for the updated Web Ring

Today I am featuring a fellow artist who is participating in the Treasure Hunt, Siara Acdal from Hawaii.  Siara has lots of great ideas on her blog, so be sure to check it out!  In fact, she's posted several since I picked out this project to feature.  Here's the address:


 I thought this tag that Siara made with the Two Tags die was really cute.  Siara listed the supplies on her blog and I am copying them here for you:

Stamp Set:
*Perfectly Preserved (#126692 Clear Mount or #126690 Wood Mount)

Card Stock:
Cajun  Craze (#119684)
Very Vanilla (#101650)

Designer Series Paper:
Summer Smooches (#125409)

Classic Stampin Pad:
Cajun Craze (#126965)
Old Olive (#126953)

Framelit Dies:
*Cannery Set (#127822)
Bitty Banners Framelits (#129267)

Punch:
Small Oval (#120908)

BigZ Die:
Two Tags (#115954)

Embossing Folder: .
*Woodgrain (#127821)

Embellishments:
1/8" Taffeta Ribbon (#119256)

*Items found in Stampin' Up!'s 2012-2013 Holiday Mini Catalog

Siara was kind enough to feature me on her blog.  You can see her post here.  You can see my post that was featured here.

So go check out Siara's blog and leave her a nice comment.  Then come back and leave me  a comment to let me know what you think.  Would you like to see me feature more Late Night Stampers on my blog?

LinkWithin

Related Posts Plugin for WordPress, Blogger...